30 Years of Excellence

-
For IndividualsBack to main menu
For Individual
-
Windows Data Recovery
Recovers lost or deleted Office documents, emails, presentations & multimedia files.
-
Mac Data Recovery
Recovers deleted files, photos, videos etc.
-
Photo Recovery
Recover photos, videos, & audio files from all cameras and storage on Windows or Mac.
-
iPhone Data Recovery
- Android Data Recovery
-
Video Repair
-
Photo Repair
Repair multiple corrupt photos in one go. Supports JPEG & other formats.
-
Data Erasure
-
-
For BusinessBack to main menu
For Business
-
Email Repair
-
Email Converter
- OST to PST Convert inaccessible OST file & extract all mailbox items including deleted emails in PST
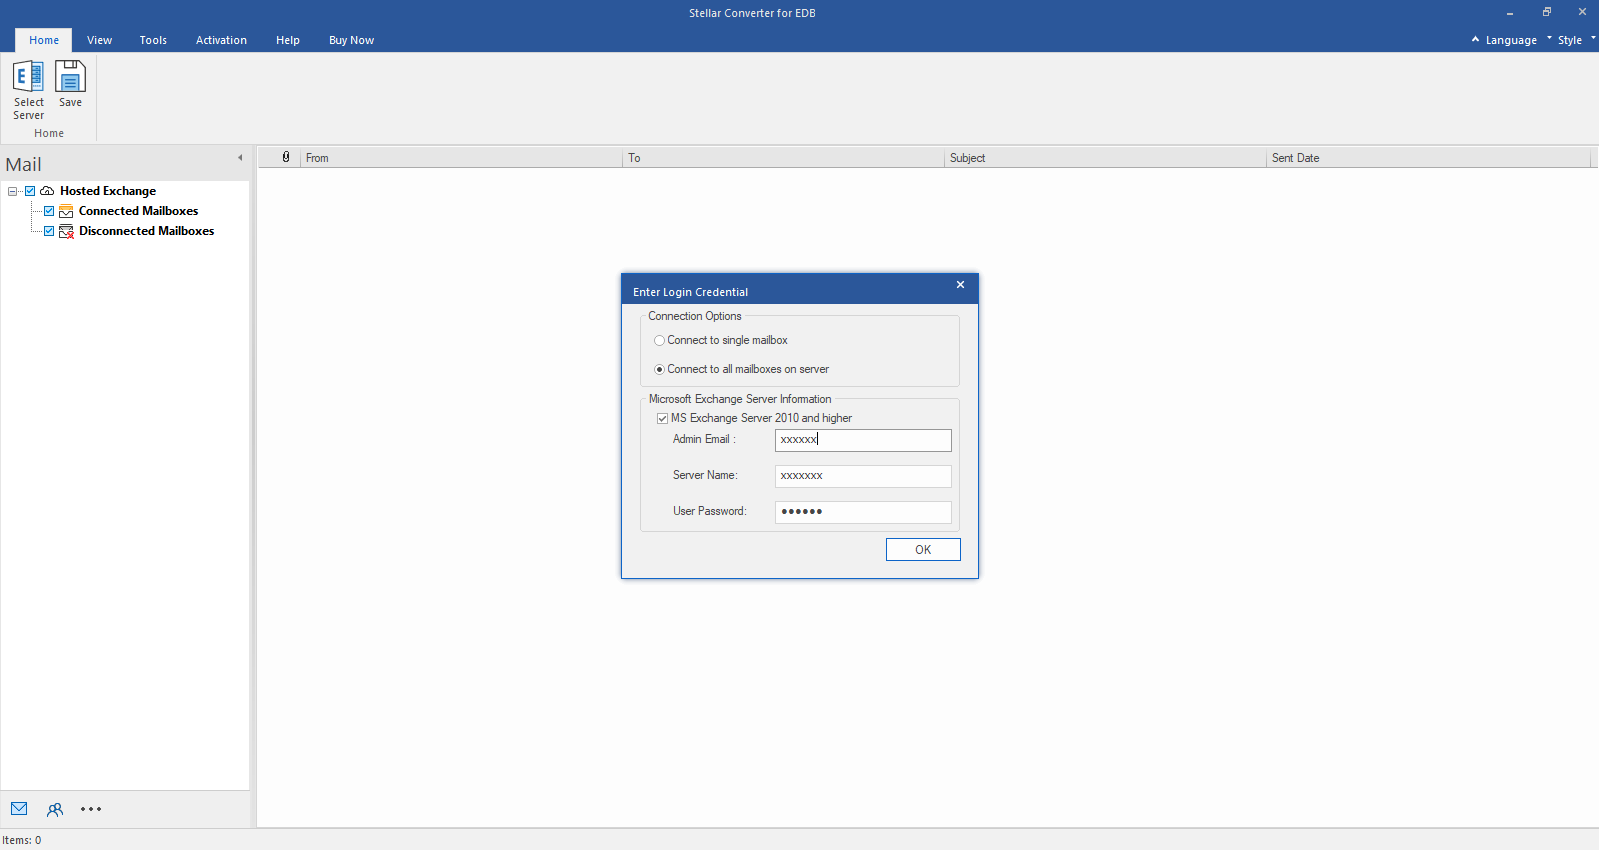
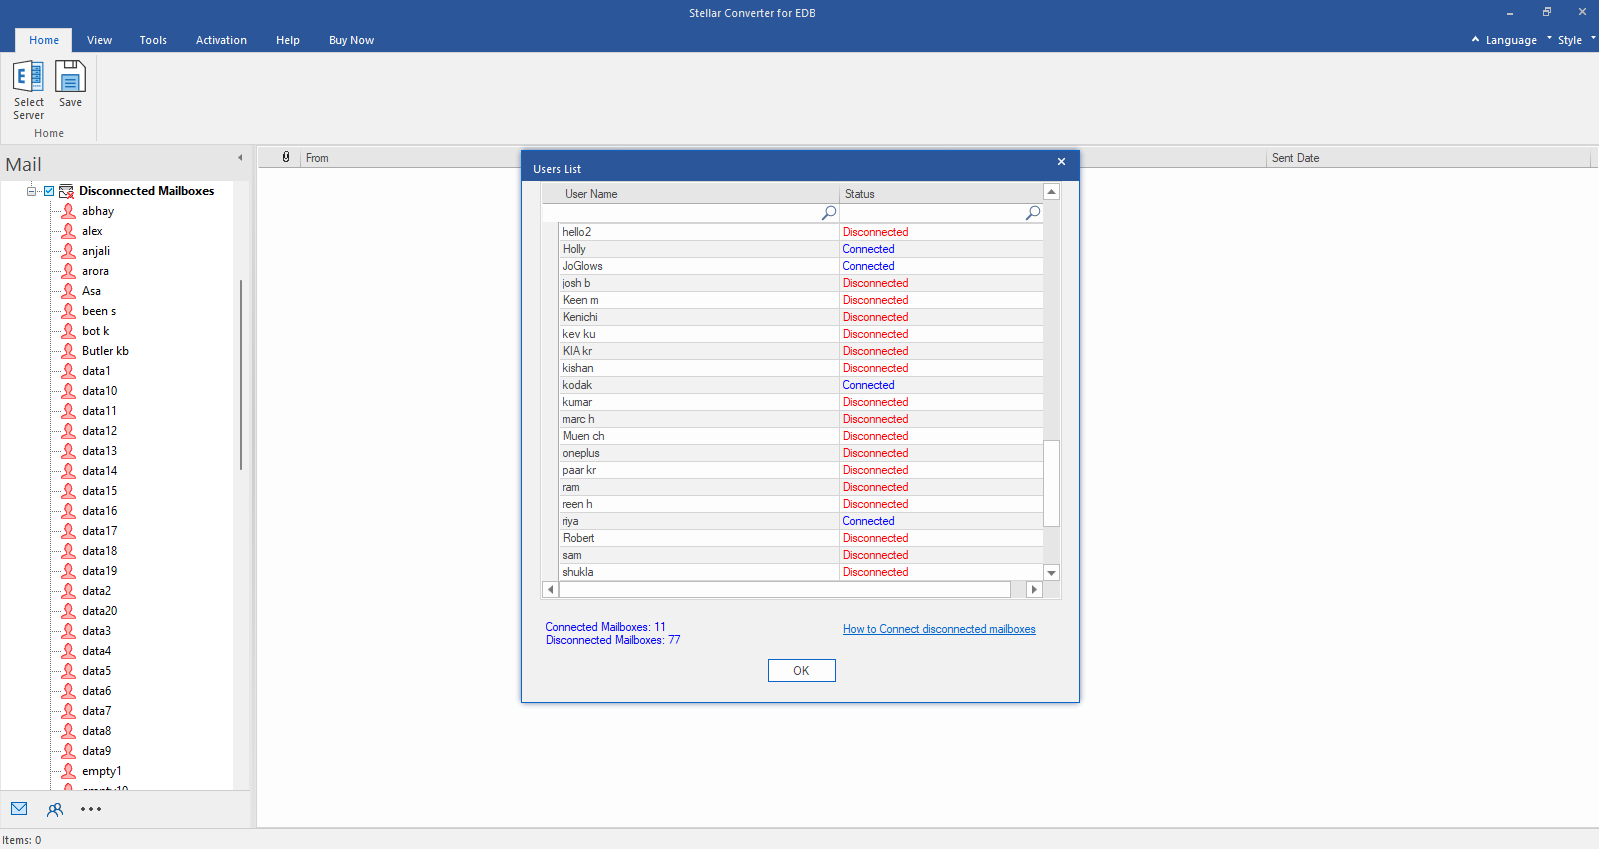
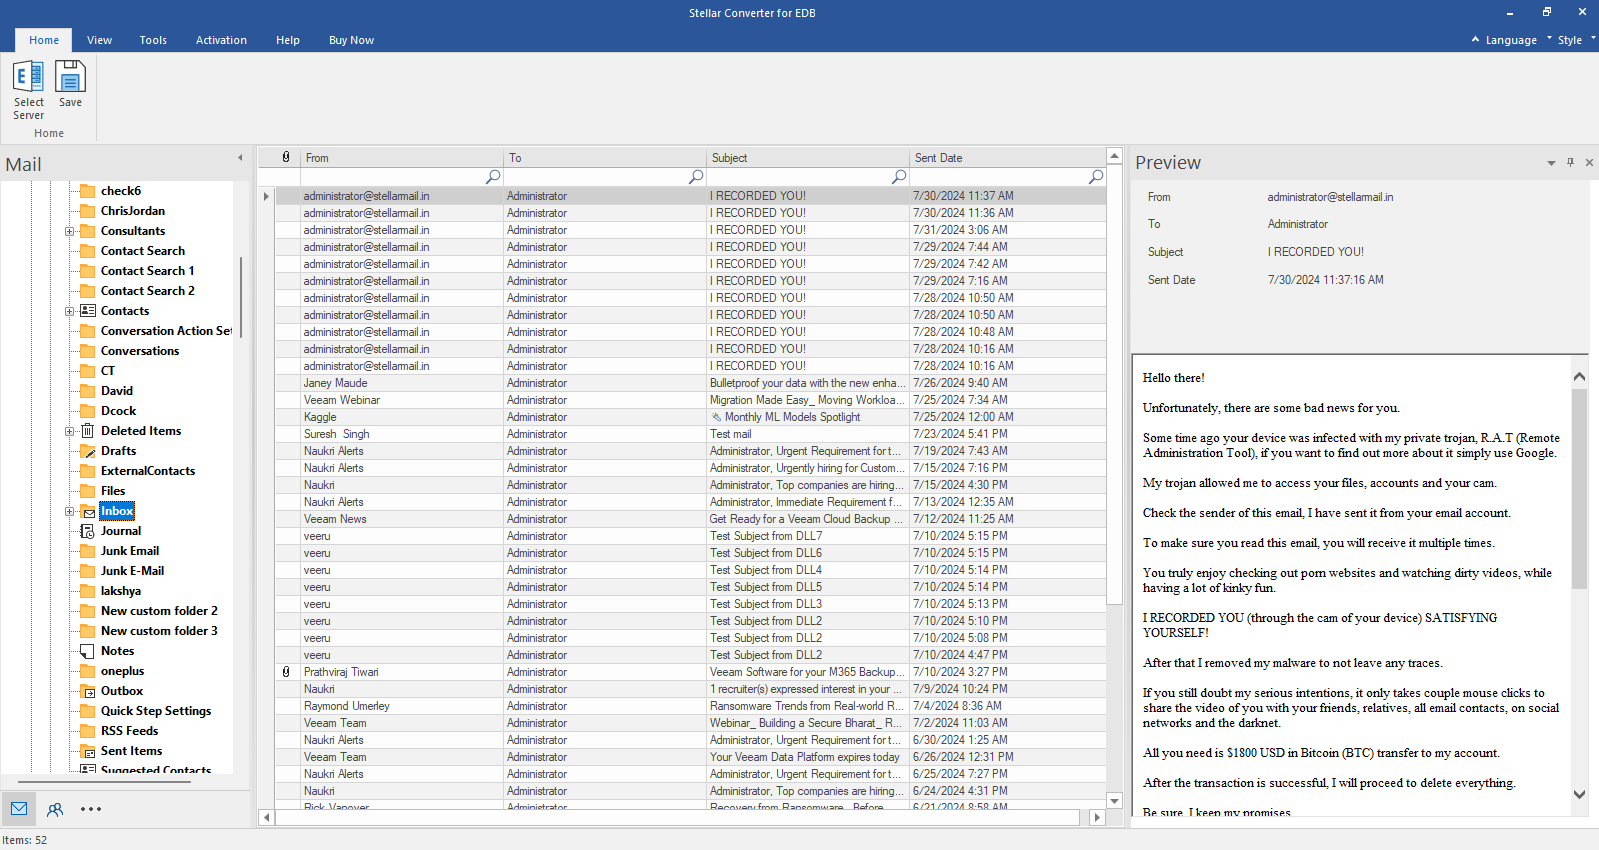
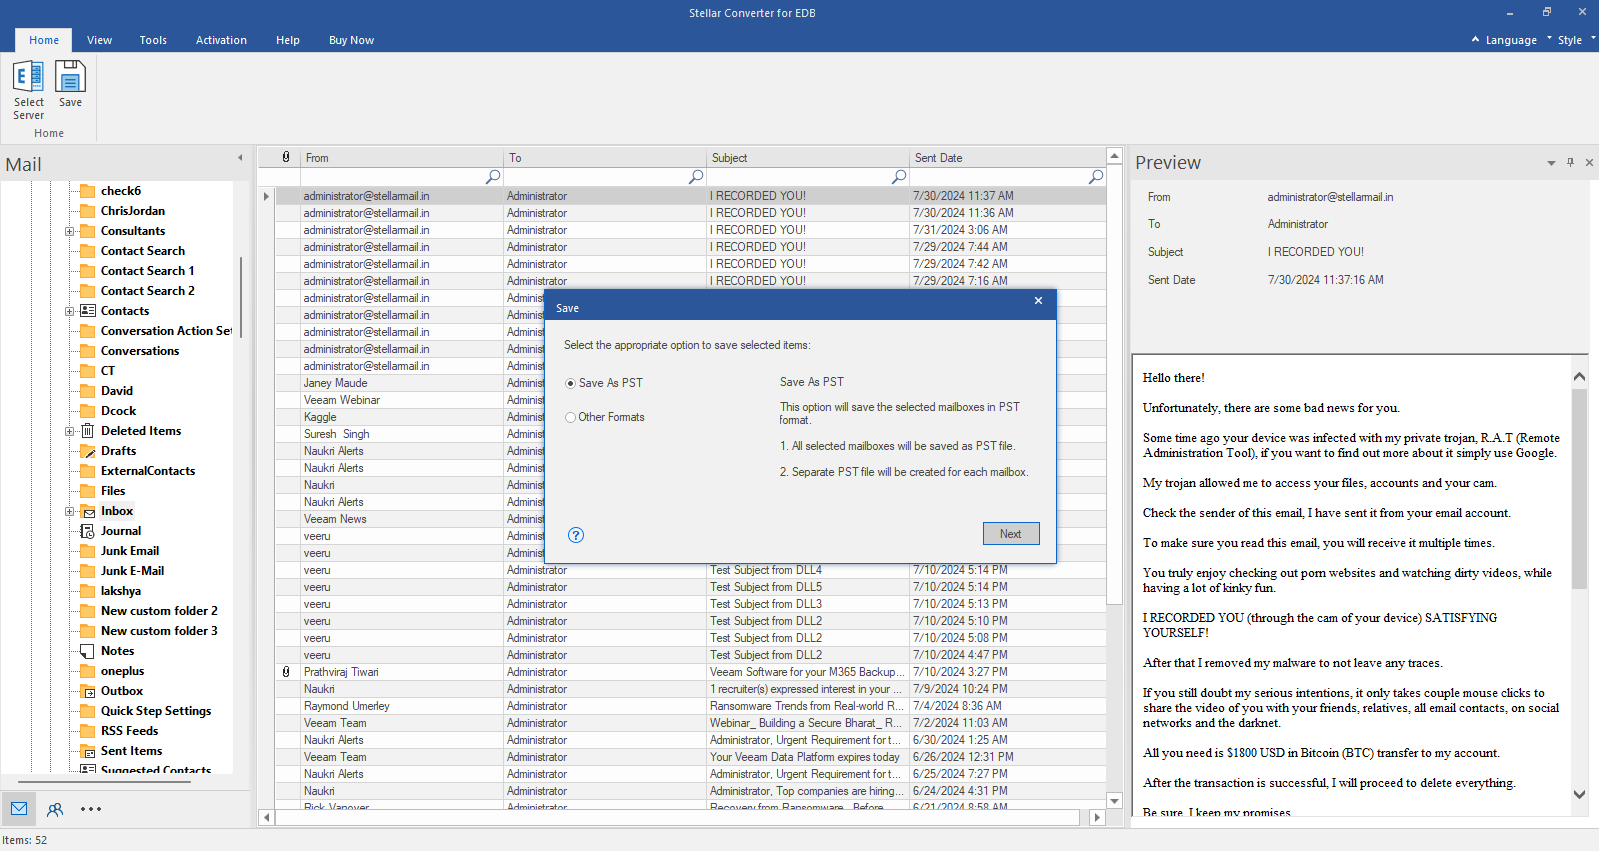
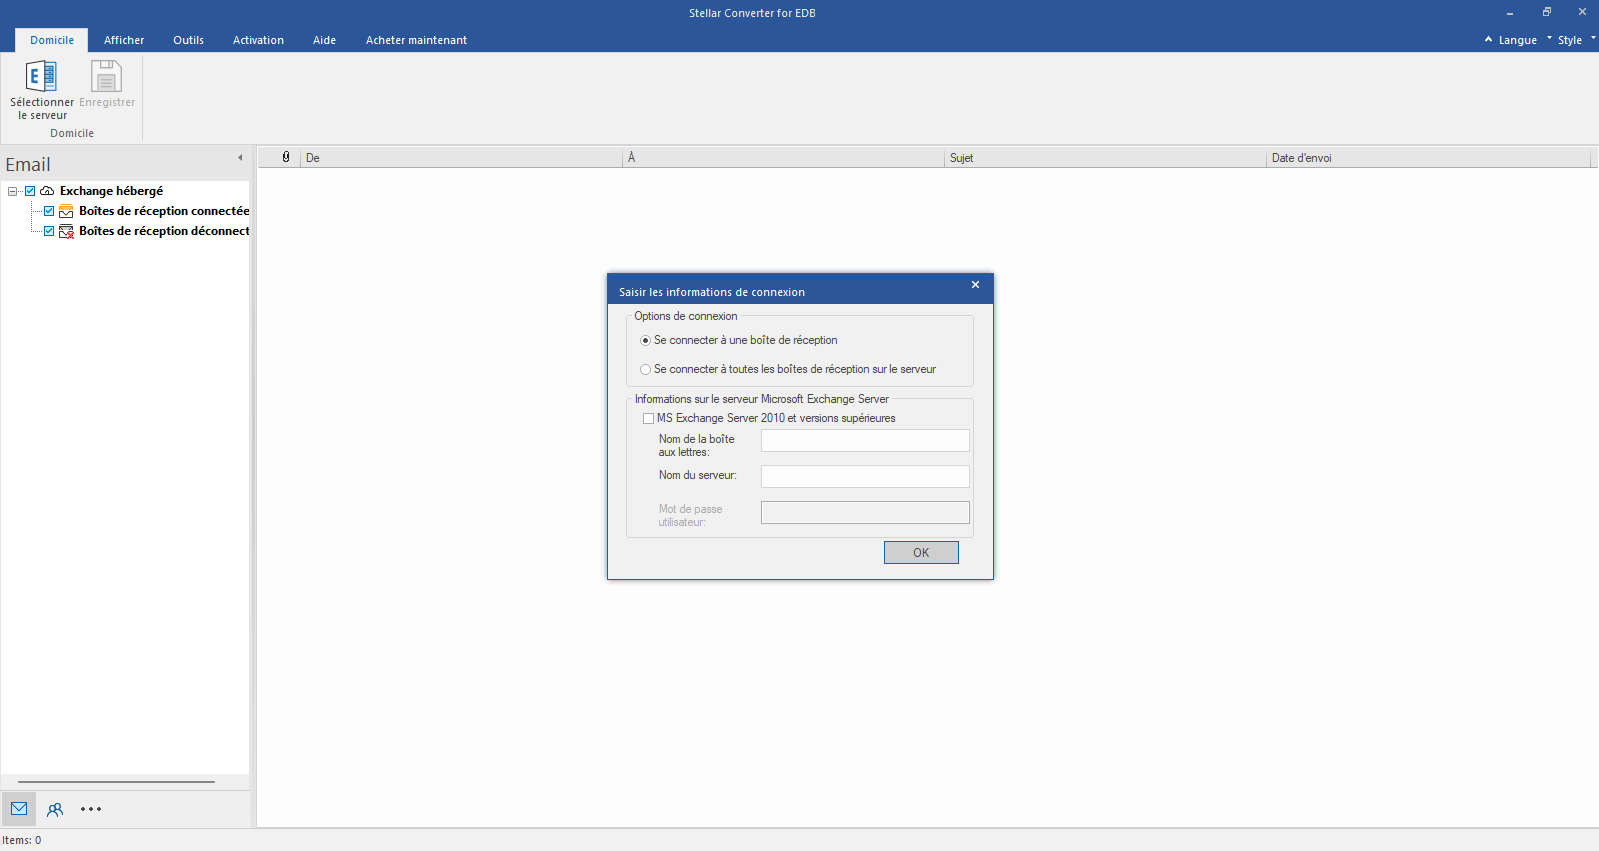
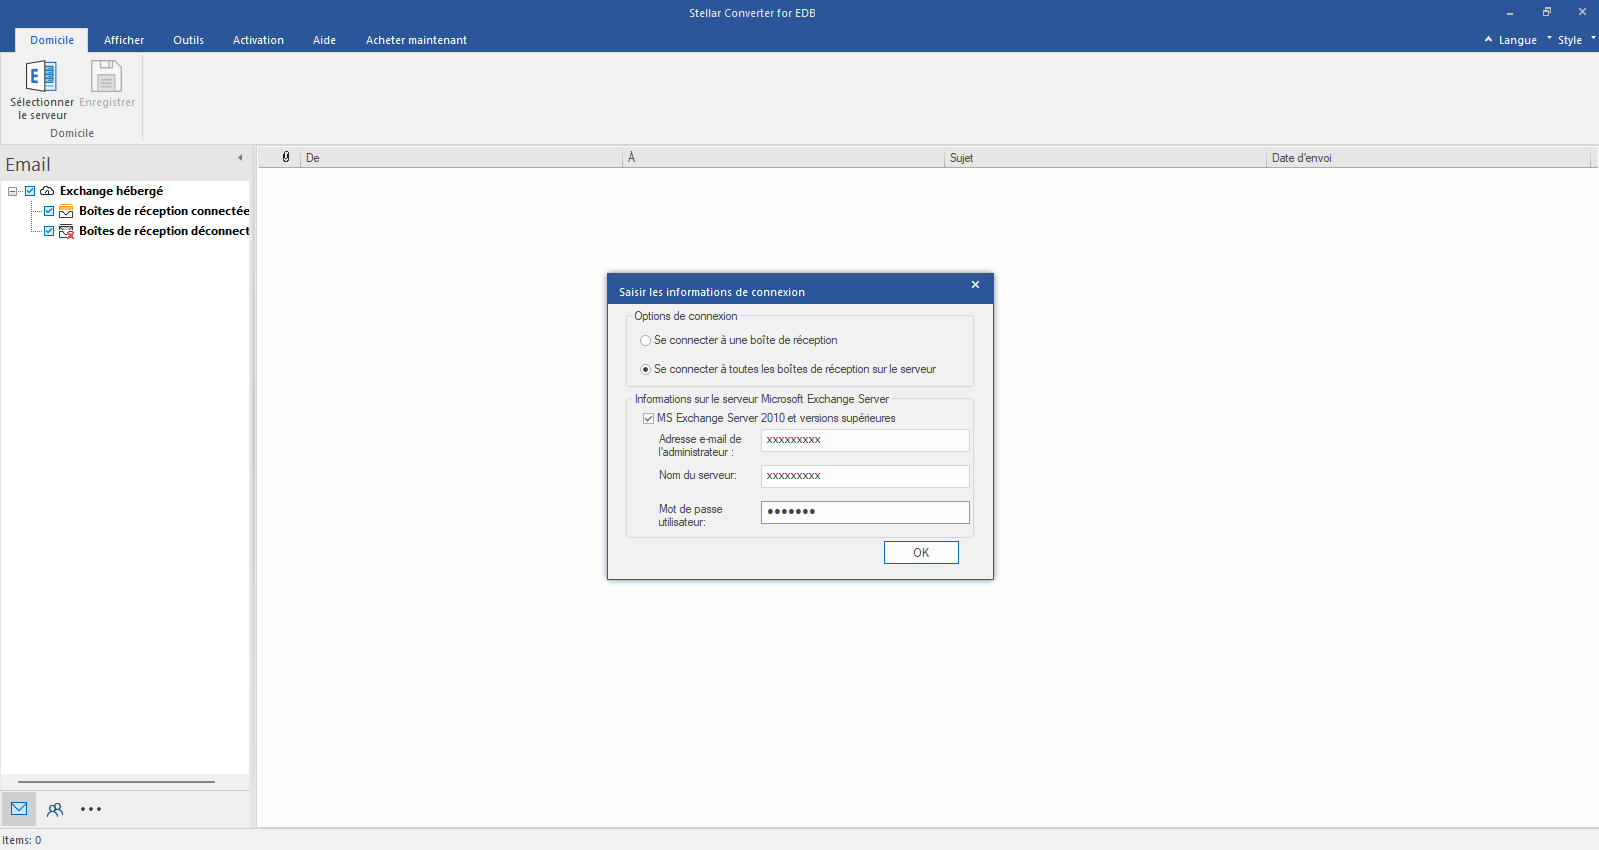
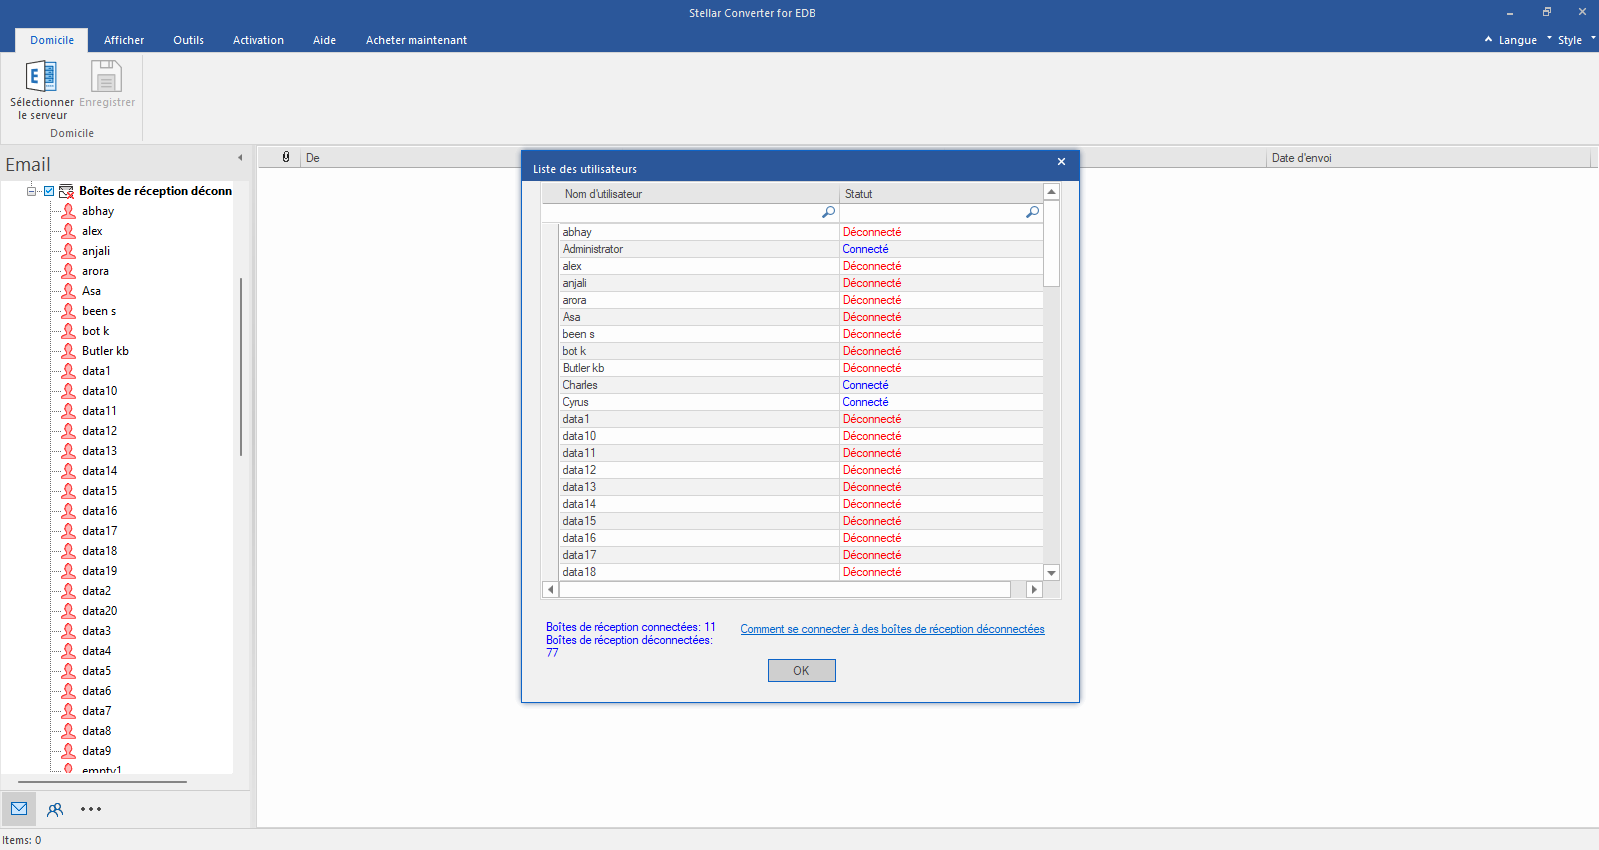
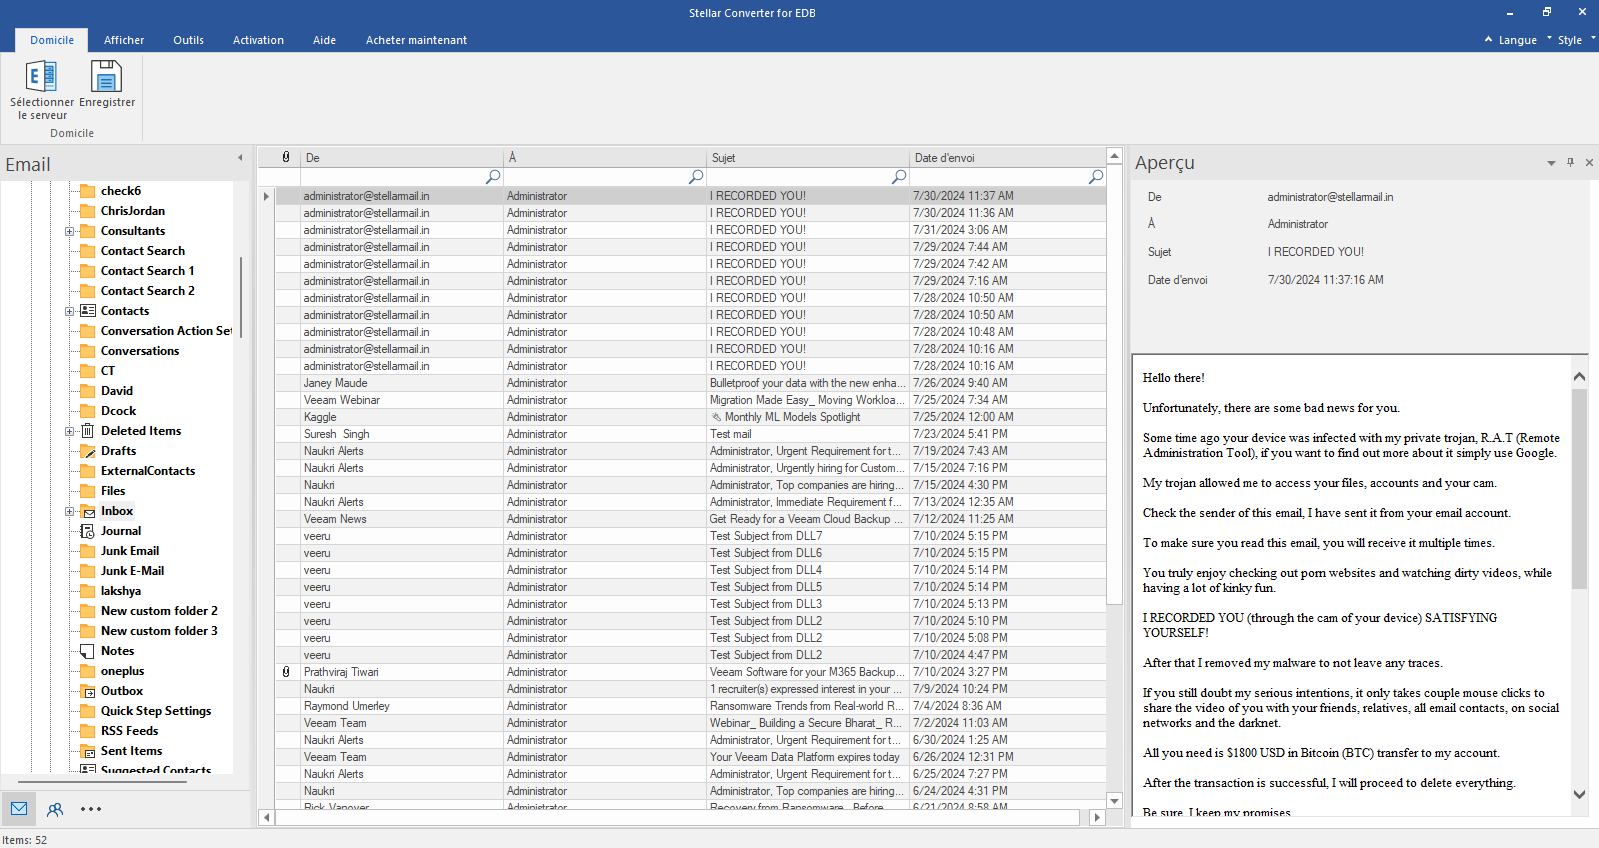
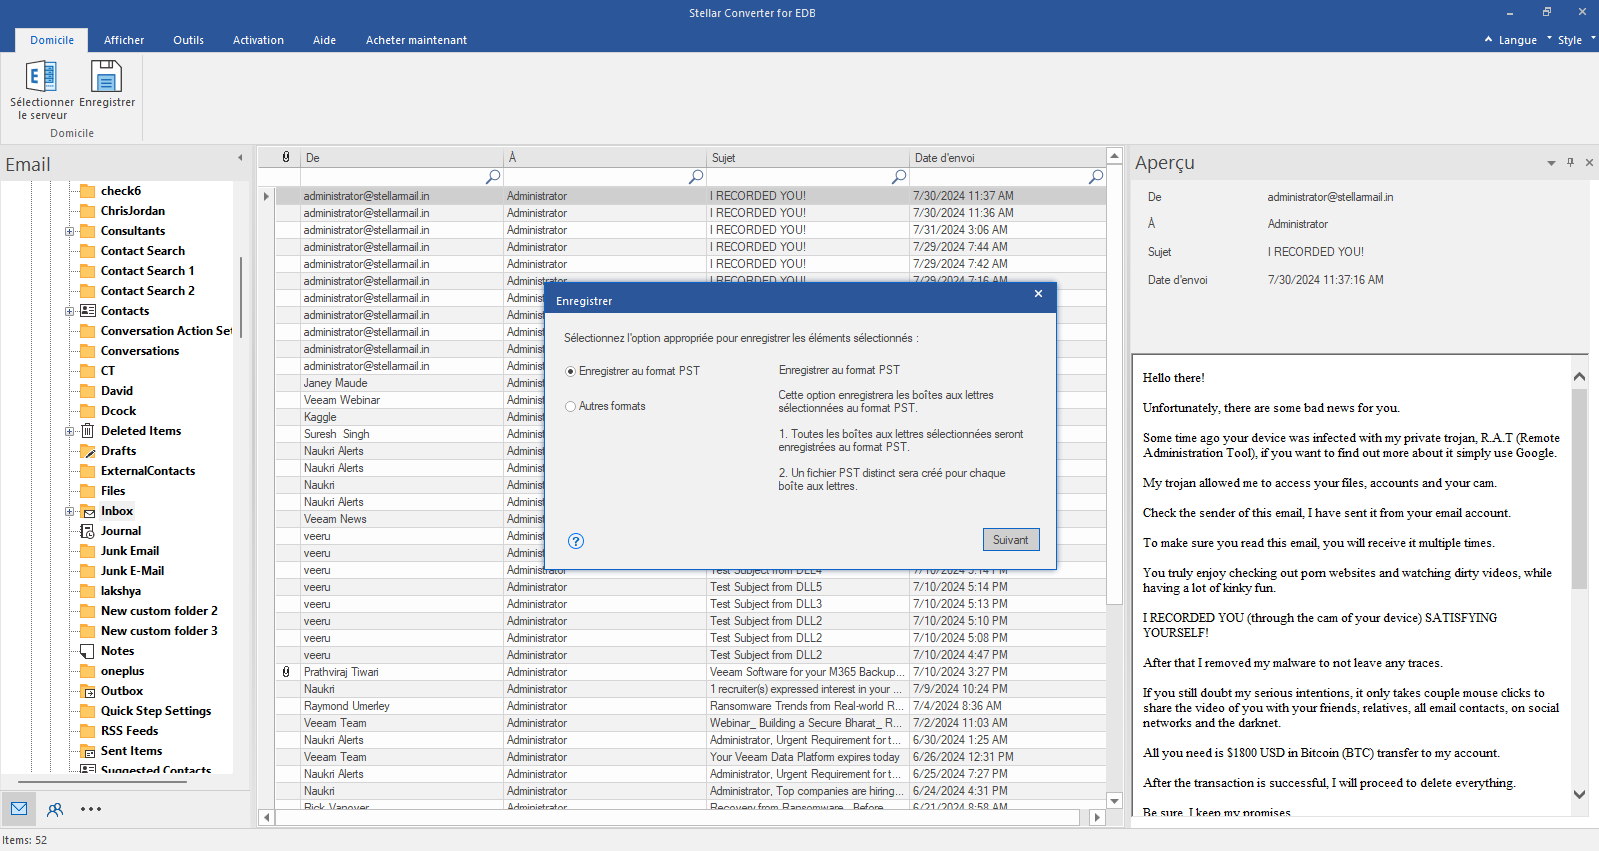
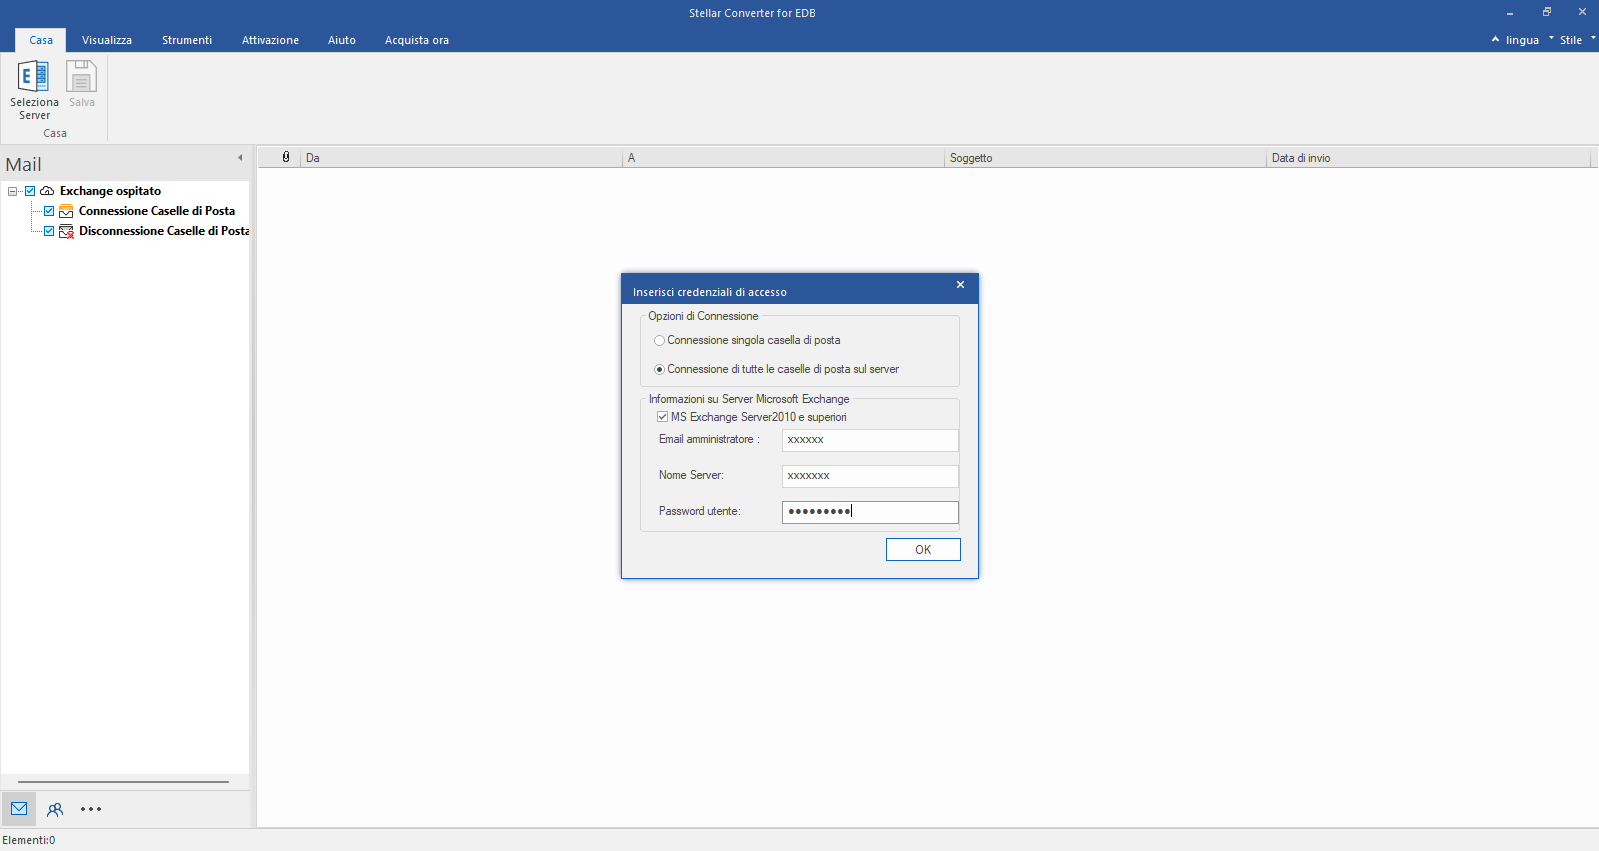
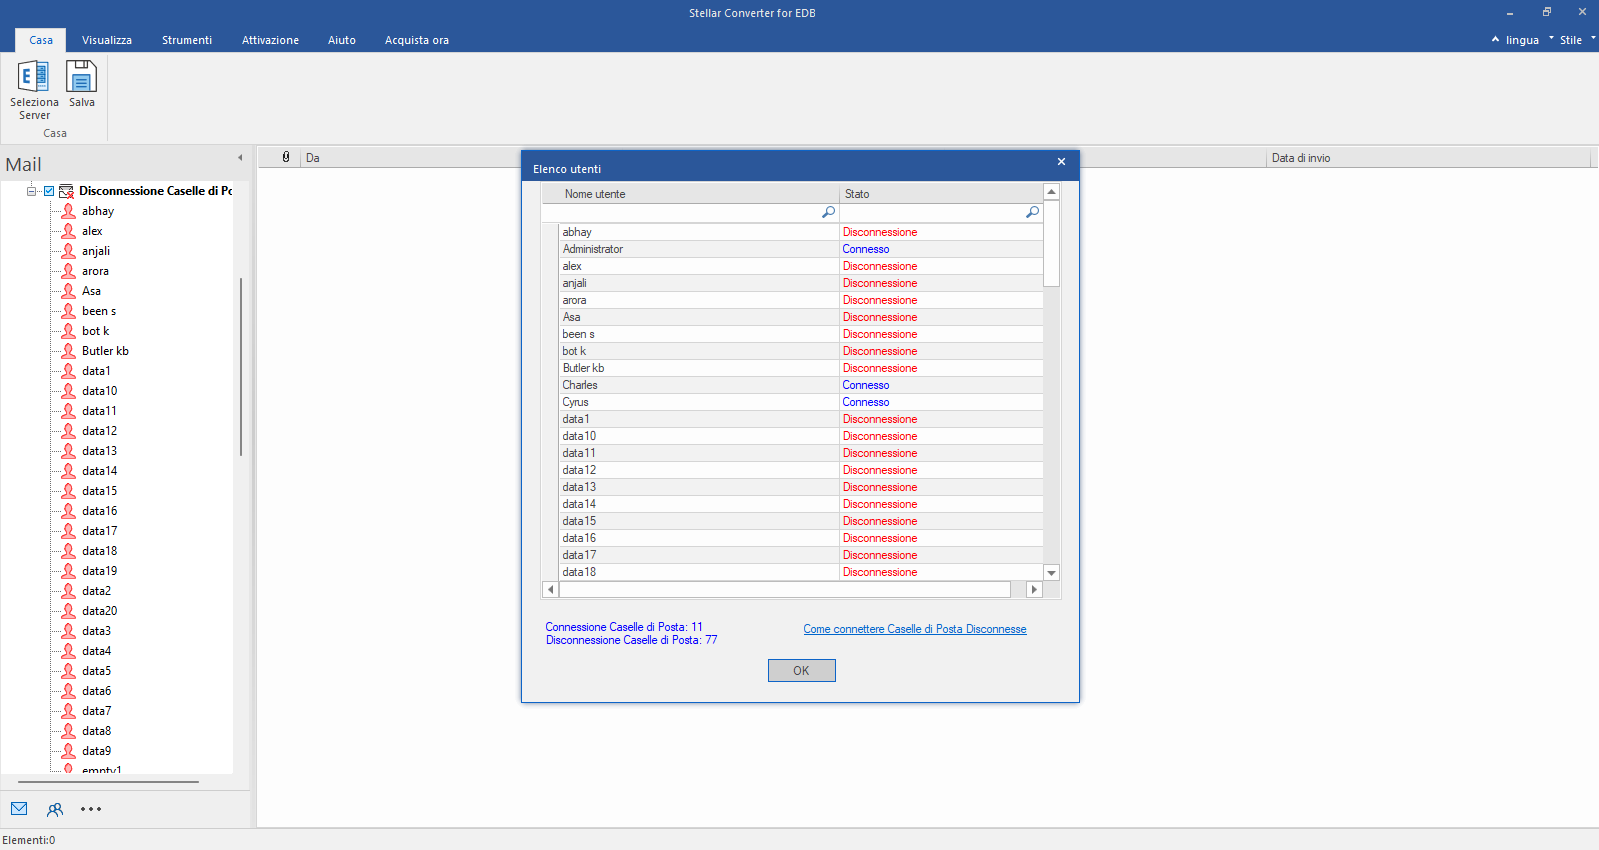
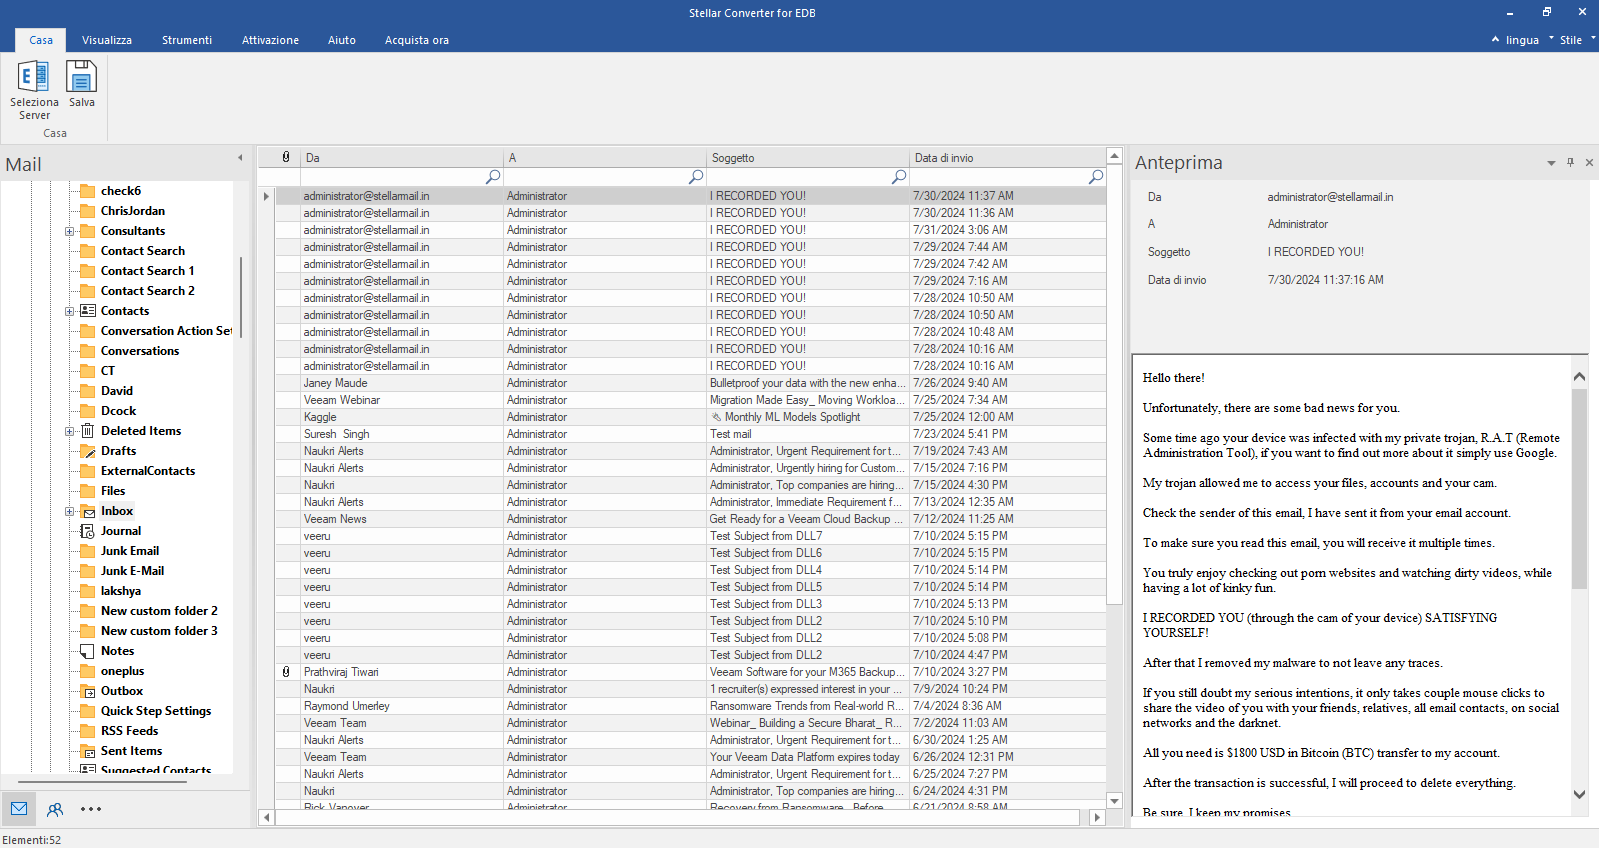
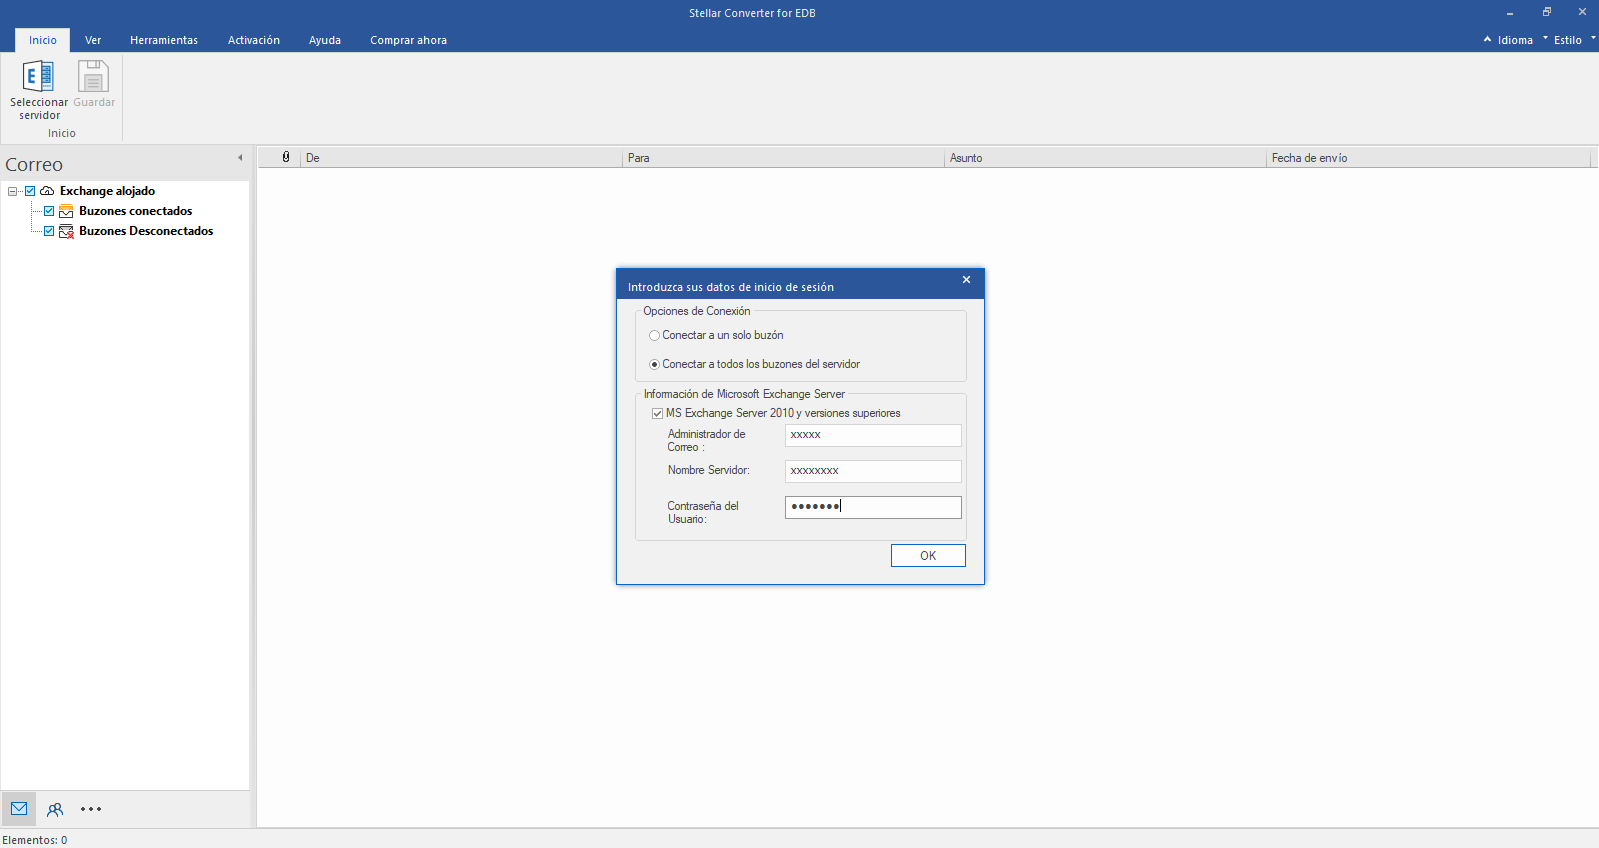
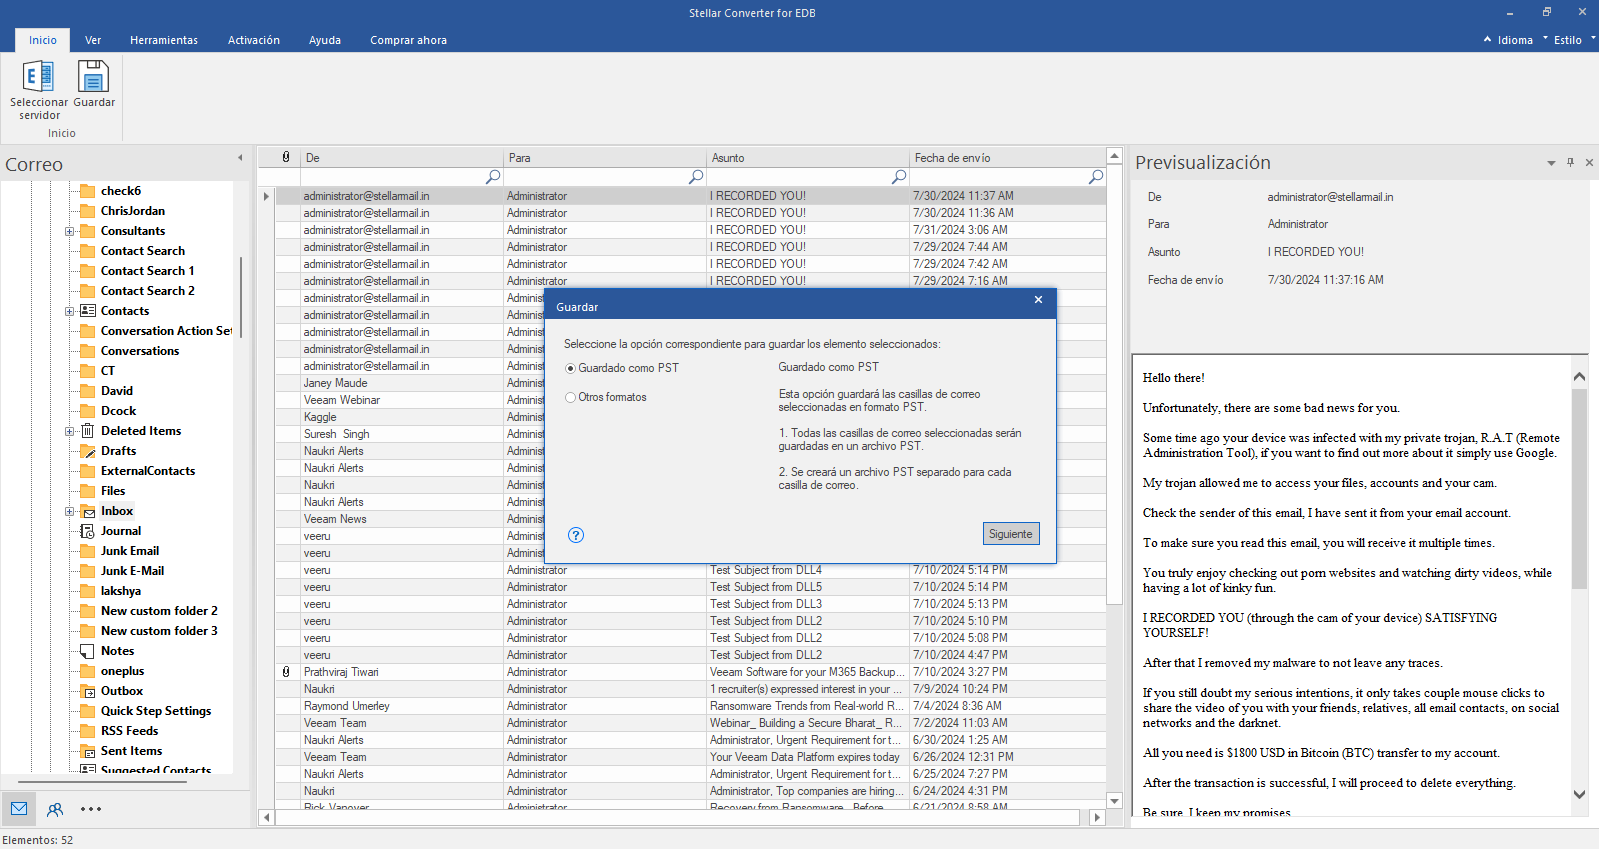
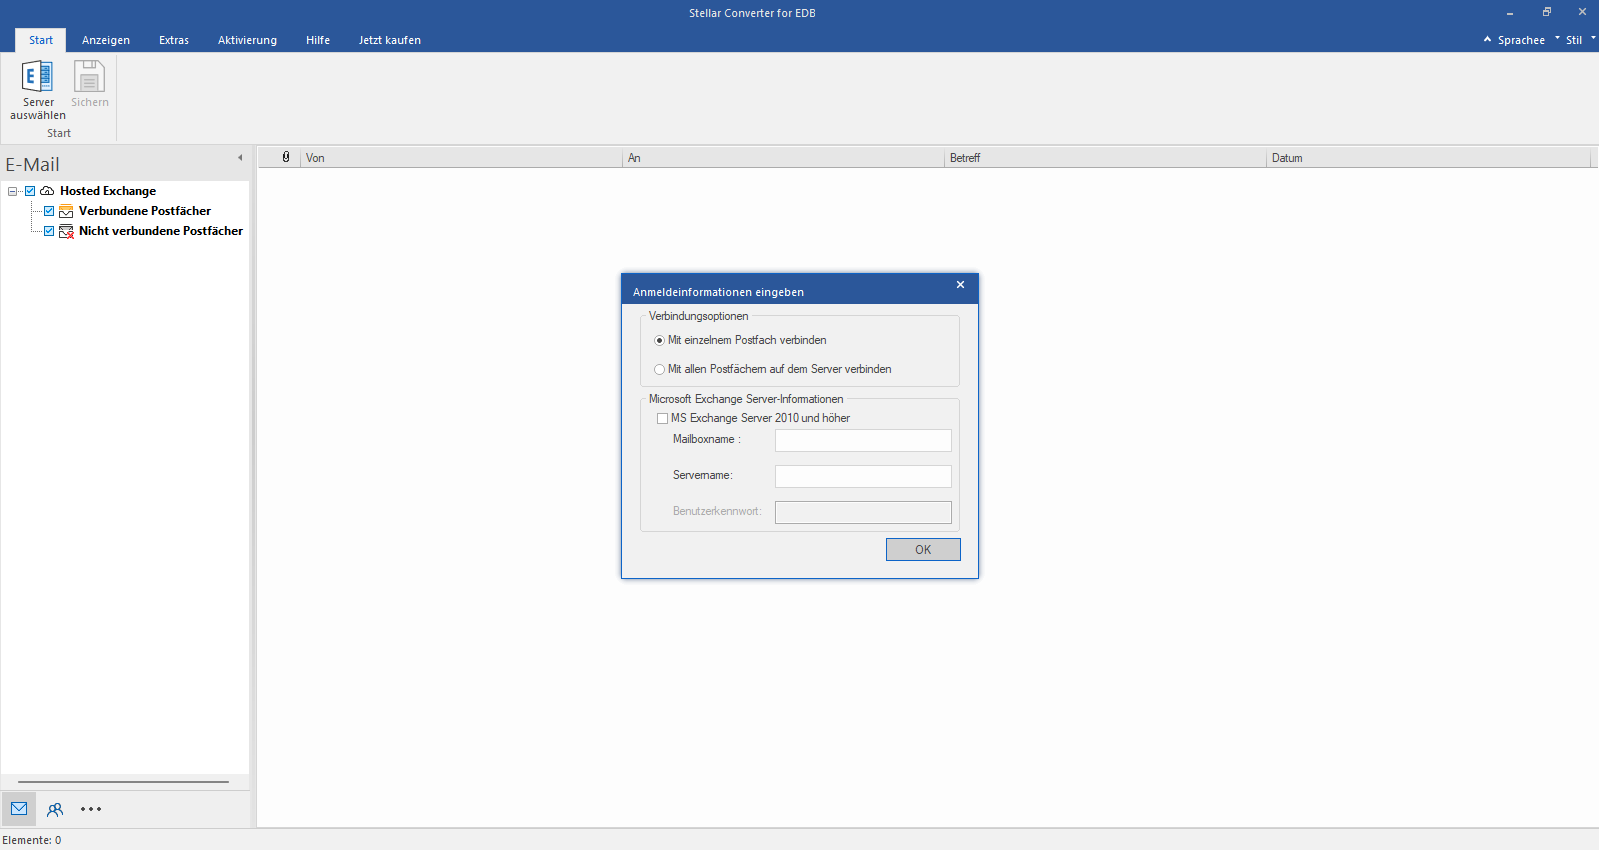
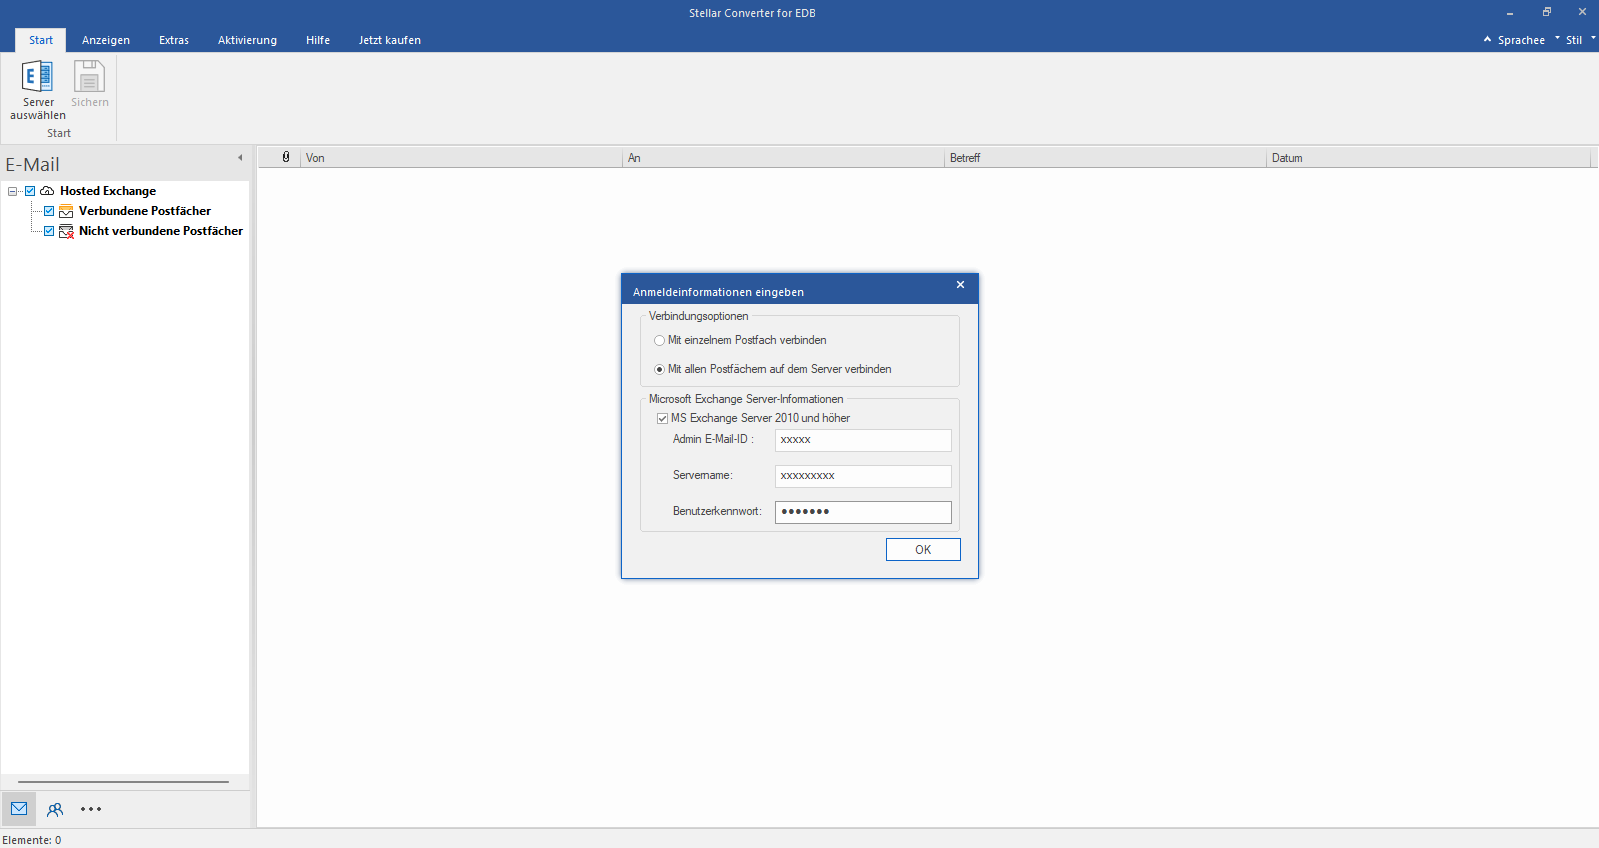
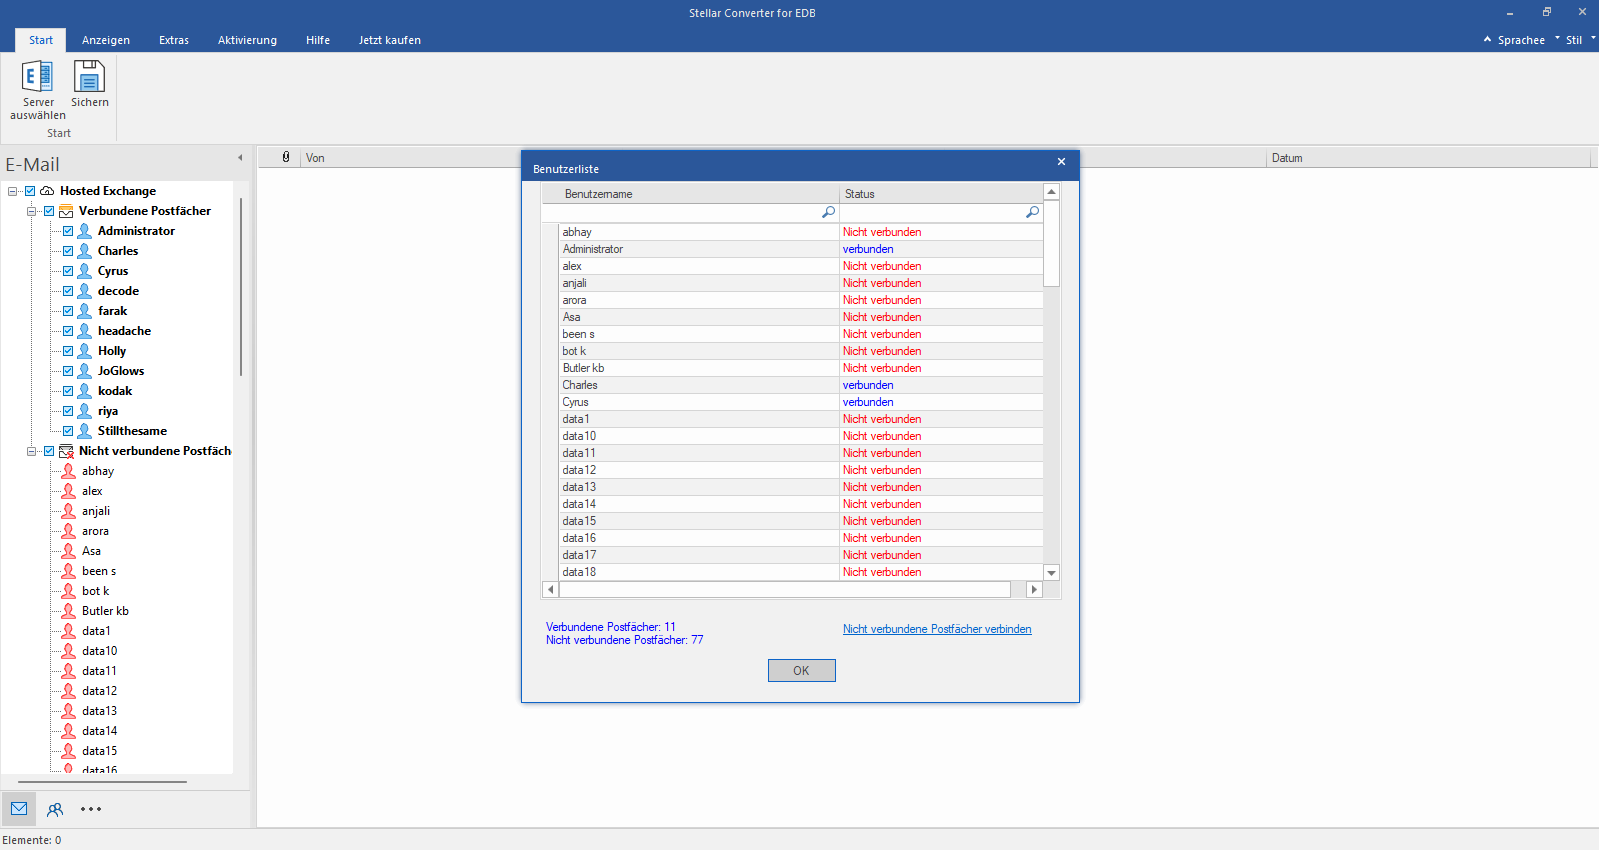
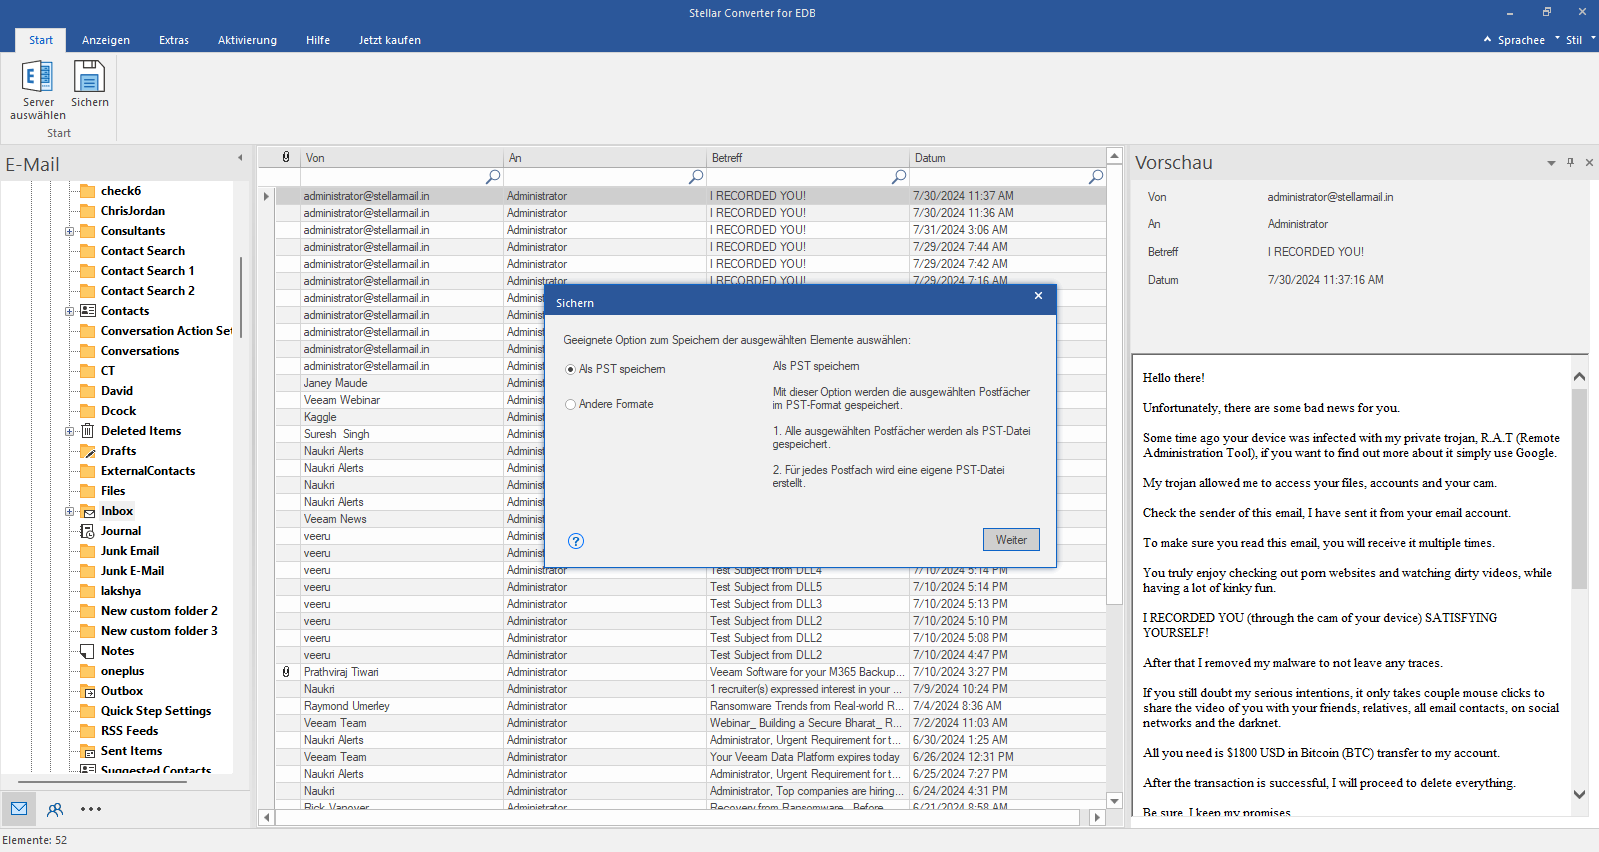
- EDB to PST Convert online & offline EDB file & extract all mailbox items including Public Folders in PST
- MBOX to PSTConvert MBOX file of Thunderbird, Entourage & other clients, & export mailbox data to PST
- OLM to PST Convert Outlook for Mac Data File (OLM) & export all mailbox data to PST in original form
- NSF to PSTConvert IBM Notes NSF file & export all mailbox items including emails & attachments to PST
- EML to PSTConvert Windows Live Mail (EML) file & export mailbox data - emails, attachments, etc. - to PST
-
File Repair
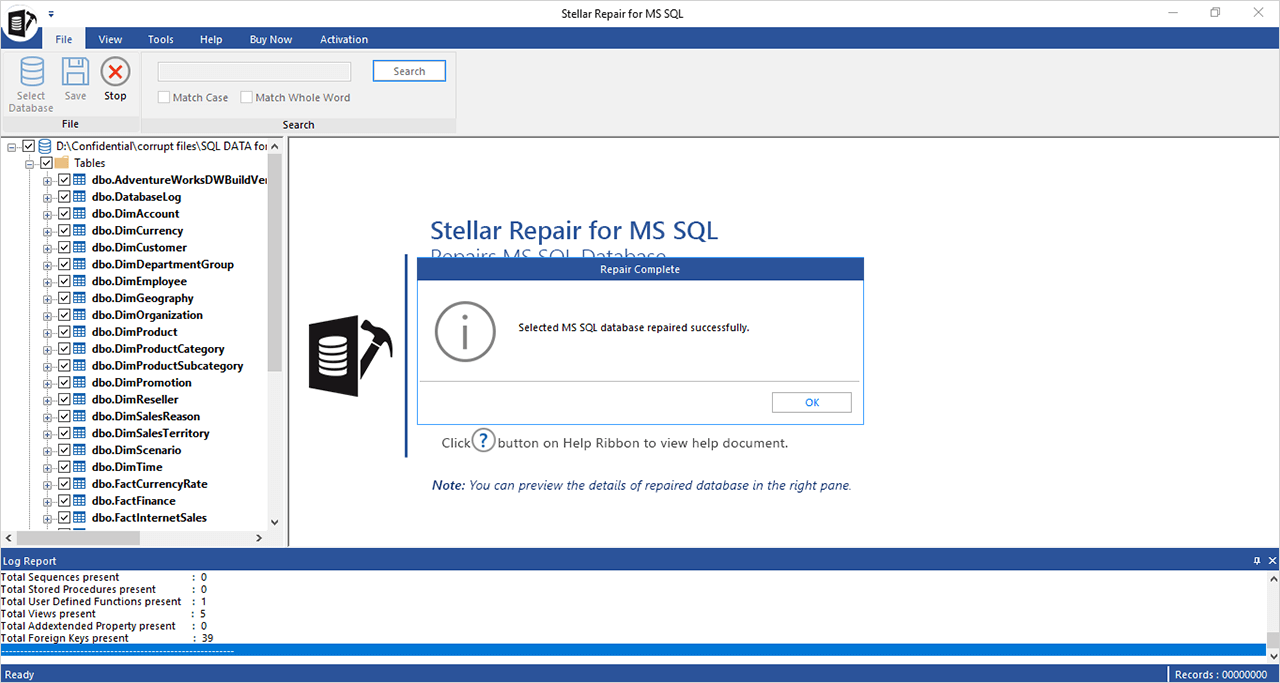
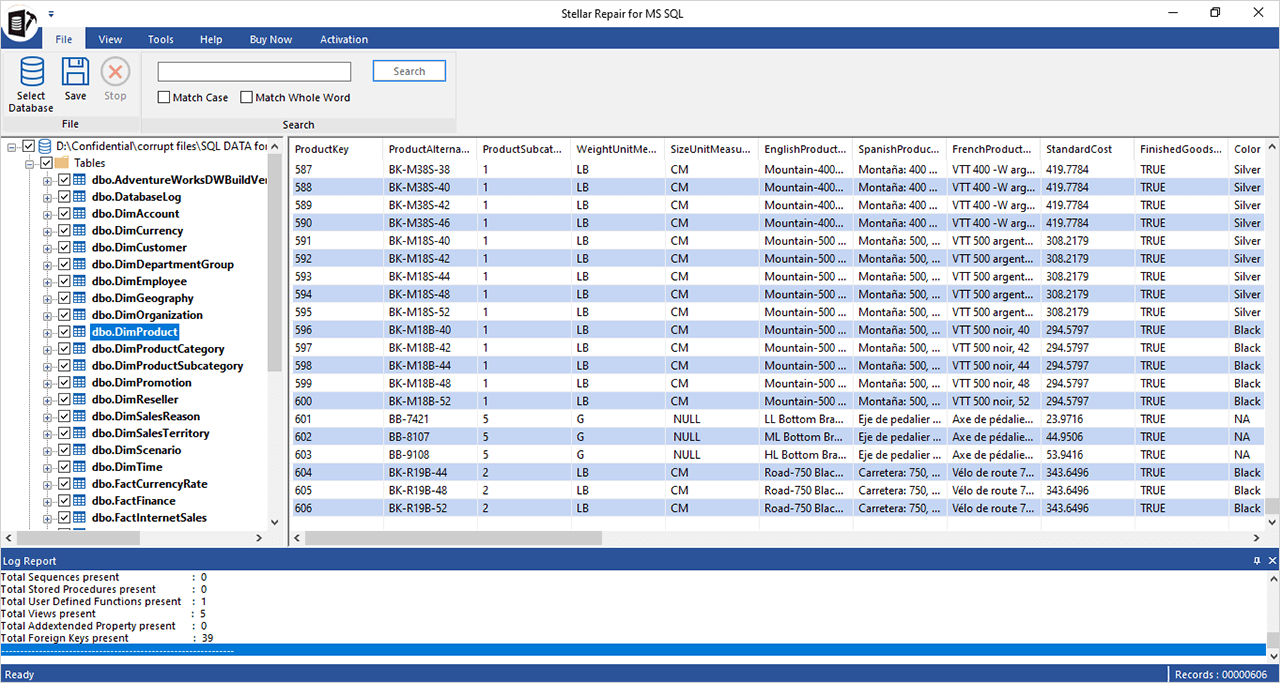
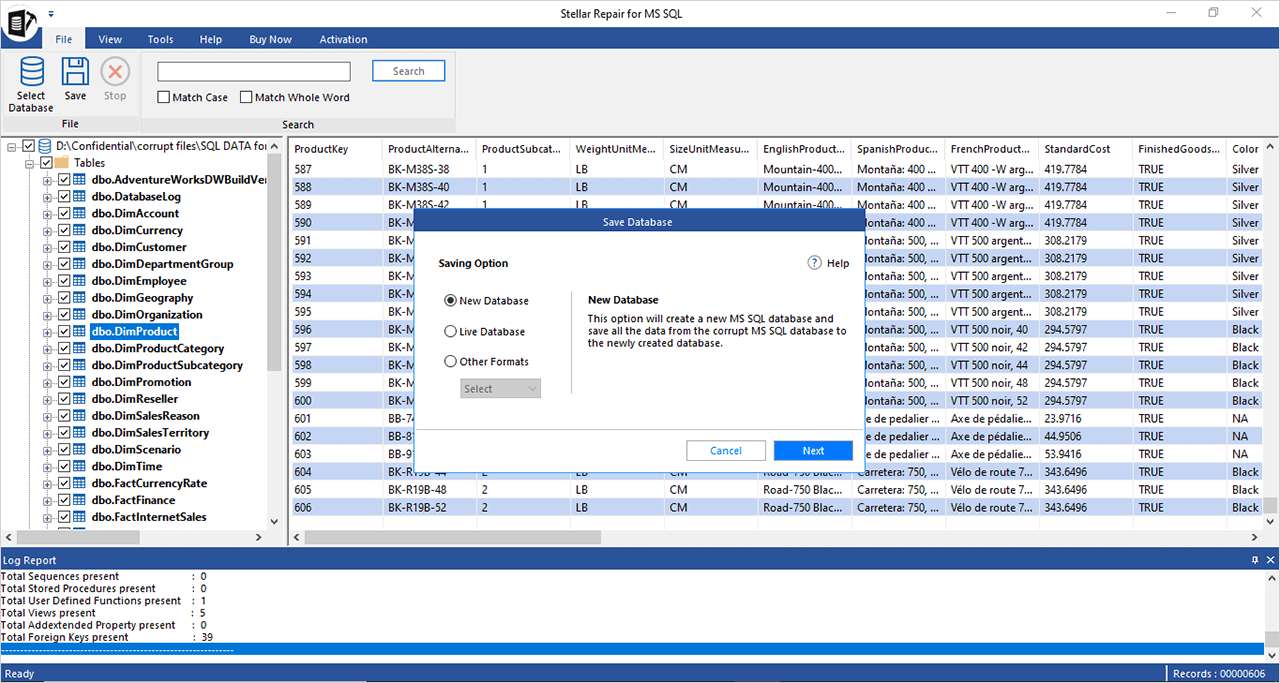
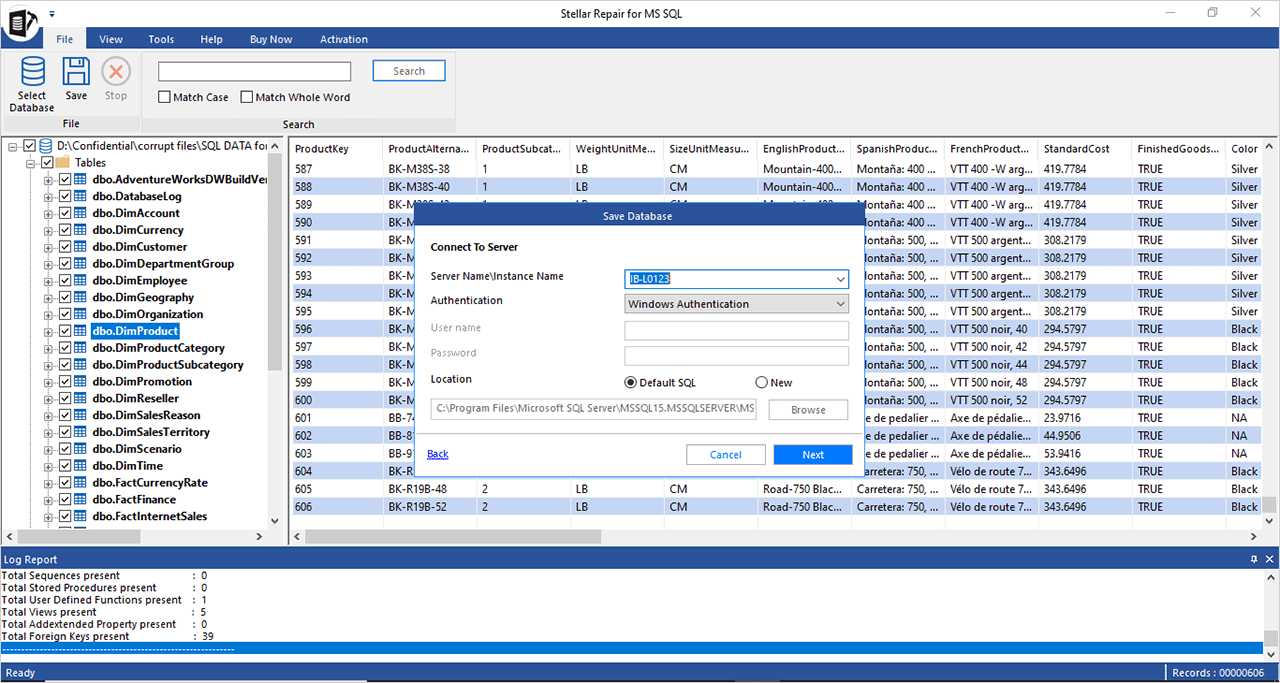
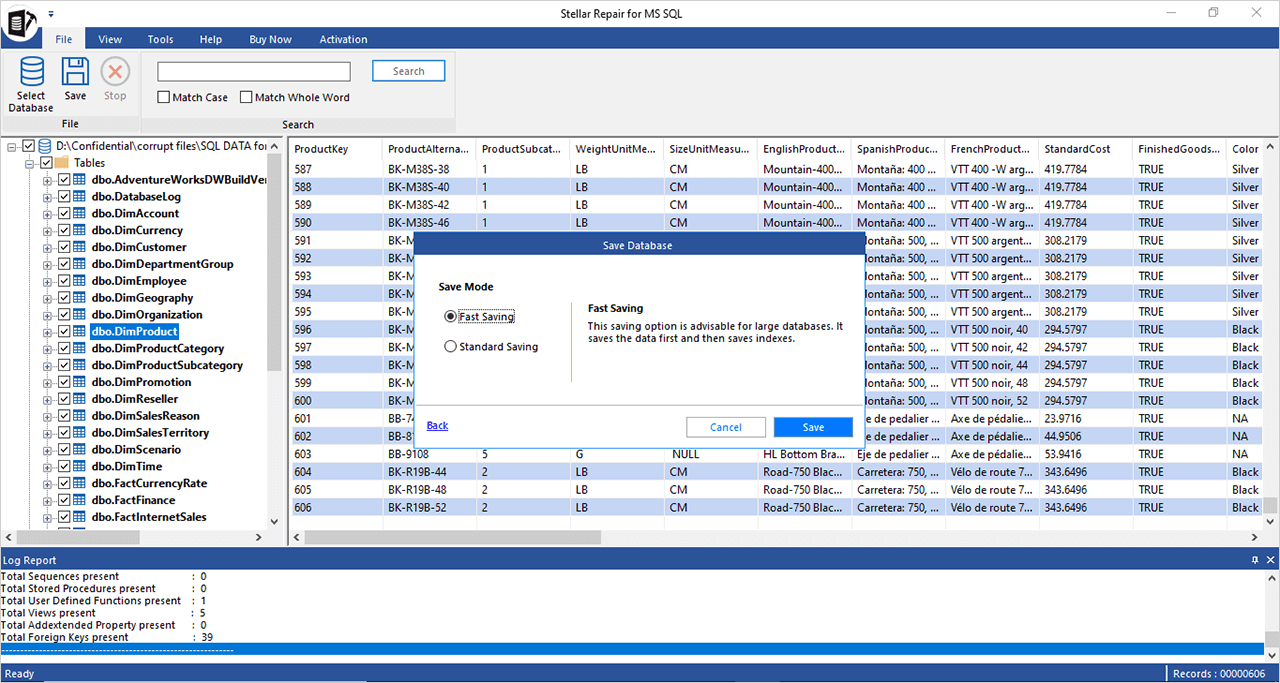
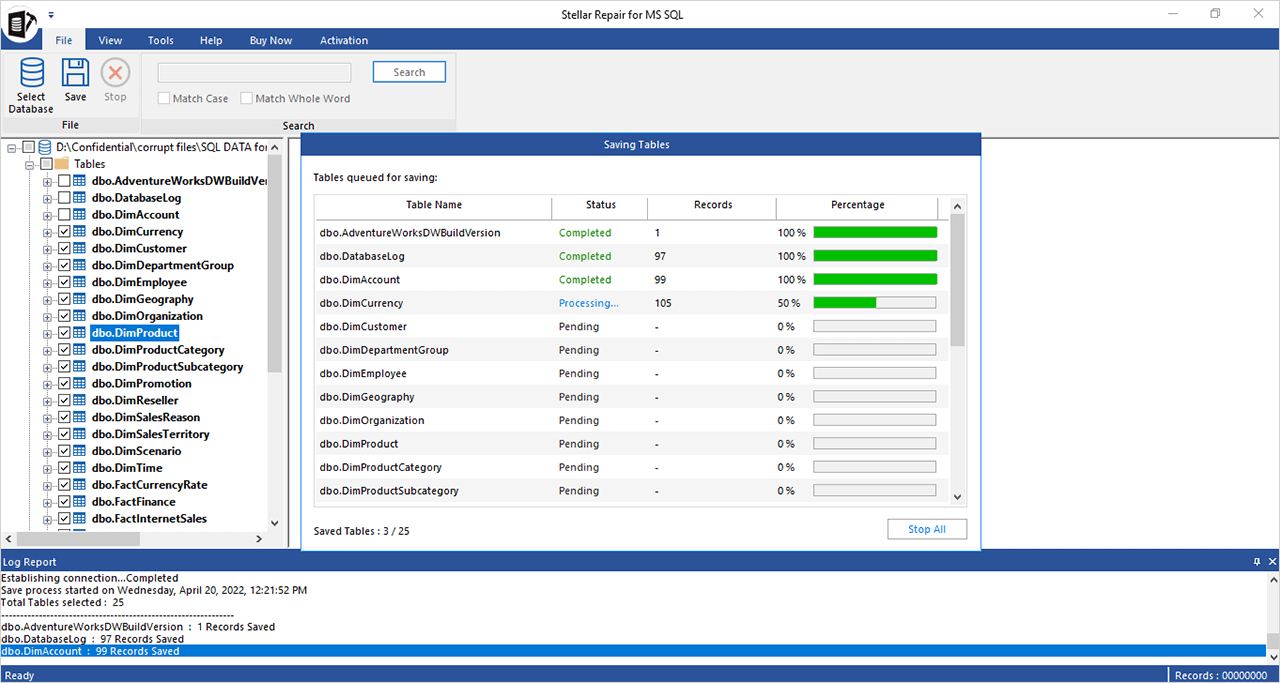
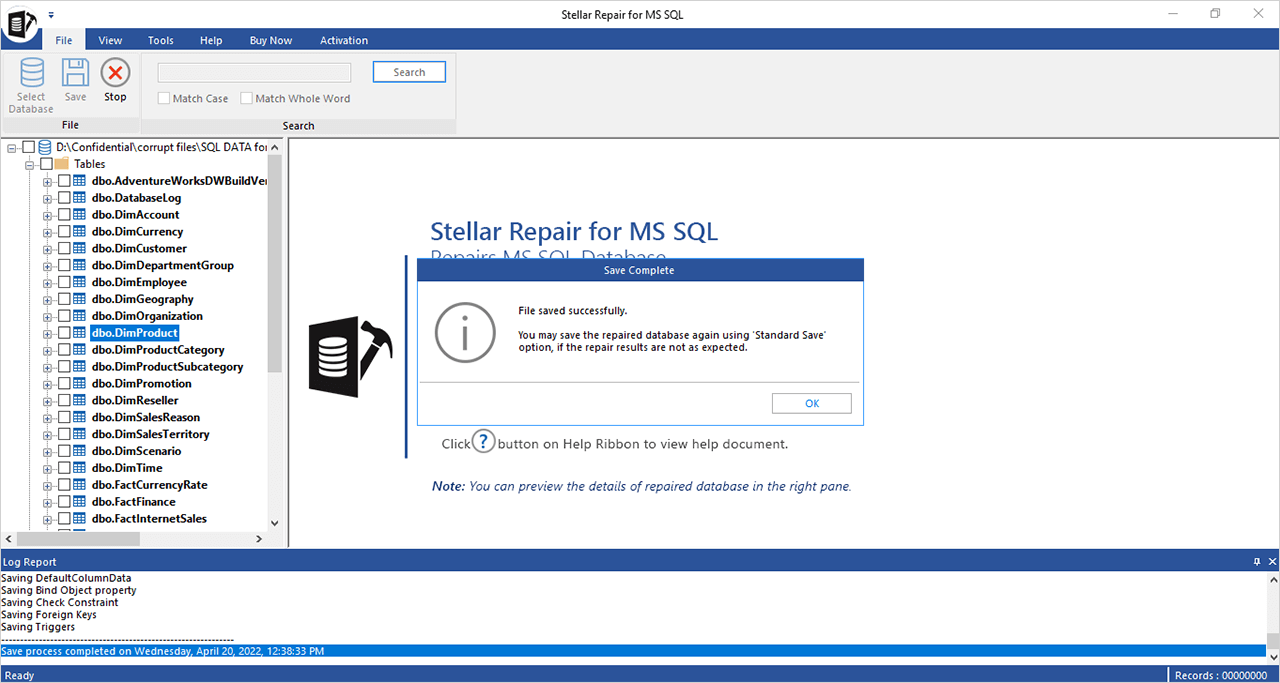
- SQL Repair Repair corrupt .mdf & .ndf files and recover all database components in original form
- MySQL RepairRepair MyISAM & InnoDB tables and recover all objects - keys, views, tables, triggers, etc.
- QuickBooks RepairRepair corrupt QuickBooks® data file & recover all file components in original form
- Access RepairRepair corrupt .ACCDB and .MDB files & recover all records & objects in a new database
- Excel Repair Repair corrupt Excel files and restore Word, PowerPoint, PDF files. Advanced options for Word, large PDFs.
- PDF Repair Fixes corrupt PDF files. Advanced mode repairs corrupt Excel, Word, and PPT, Supports Office 2019.
-
Data Recovery
- Data Recovery TechnicianRecover lost or deleted data from HDD, SSD, external USB drive, RAID & more.
- Tape Data RecoveryRetrieves data from all types and capacities of tape drives including LTO 1, LTO 2, LTO 3, & others.
- Virtual Machine RecoveryRecover documents, multimedia files, and database files from any virtual machine
- Mac Data Recovery Technician Advanced software for recovering data from SSDs, HDDs, SD Cards, & Virtual Machines.
-
Data Erasure
-
Toolkit
- Exchange Toolkit5-in-1 software toolkit to recover Exchange database, convert EDB to PST, convert OST to PST, restore Exchange backup, and reset Windows Server password.
- Outlook ToolkitComprehensive software suite to repair PST files, merge PST files, eliminate duplicate emails, compact PST files, and recover lost or forgotten Outlook passwords.
- Data Recovery ToolkitSoftware helps to recovers deleted data from Windows, Mac and Linux storage devices. Also supports recovery from RAIDs & Virtual Drives.
- File Repair ToolkitPowerful file repair utility to fix corrupt Word, PowerPoint, and Excel documents created in Microsoft Office. It also repairs corrupt PDF files and recovers all objects.
- MS SQL Toolkit5-in-1 software toolkit to repair corrupt SQL database, restore database from corrupt backup, reset database password, analyze SQL logs, & interconvert databases.
- MY SQL Toolkit3-in-1 software toolkit to repair Corrupt Mysql, MariaDB & Analyze logs, and Interconvert Databases.
-
Forensic
- Email ForensicAdvanced email forensic solution for cyber experts to audit, analyze, or investigate emails & gather evidences.
- Log Analyzer for MySQLAnalyze forensic details of MySQL server database log files such as Redo, General Query, and Binary Log.
- Exchange AuditorExchange Server monitoring solution to automate audits, scans and generate reports ìn real-time.
- Log Analyzer for MS SQLTrack & analyze MS SQL Server database transactions log files.
-
-
Lab Services
-
Our Partners
-
Resources
-
About
-
Support
-
Career
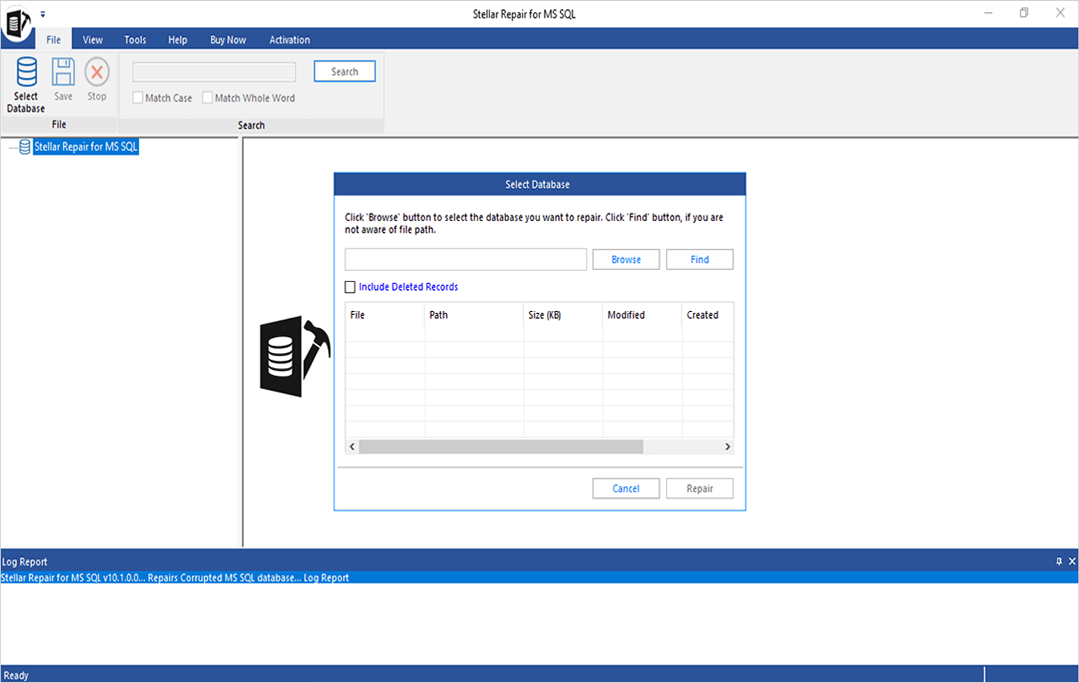
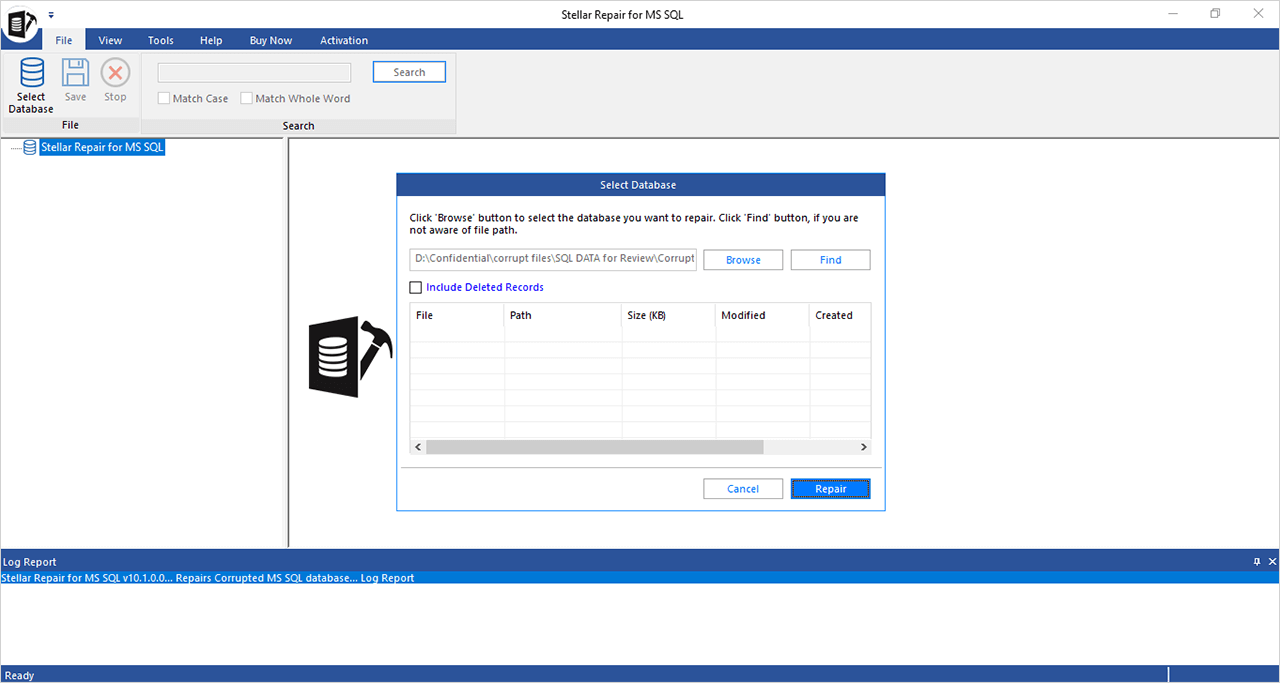
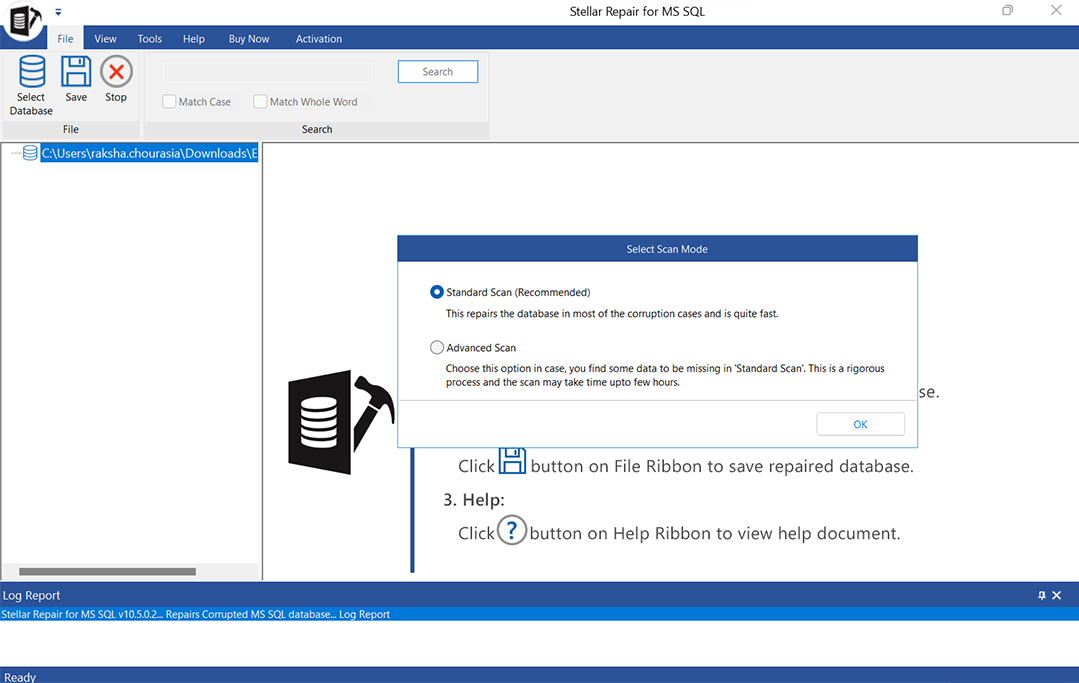
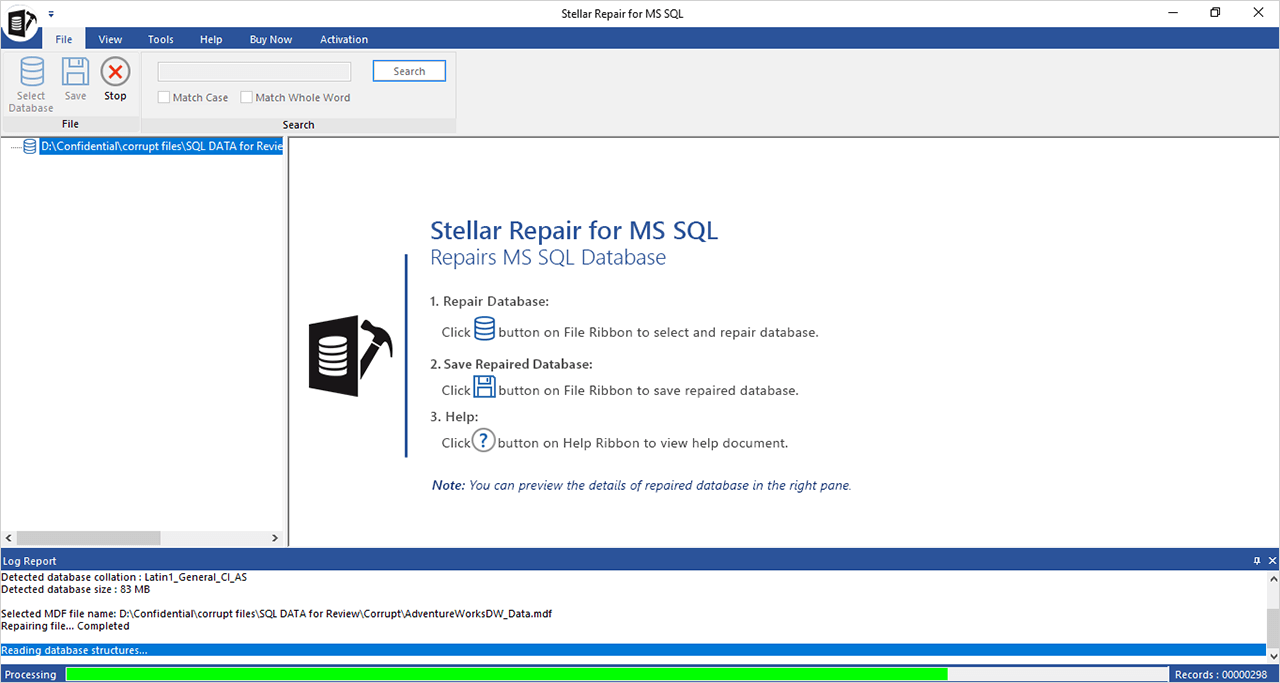


 Installation


